
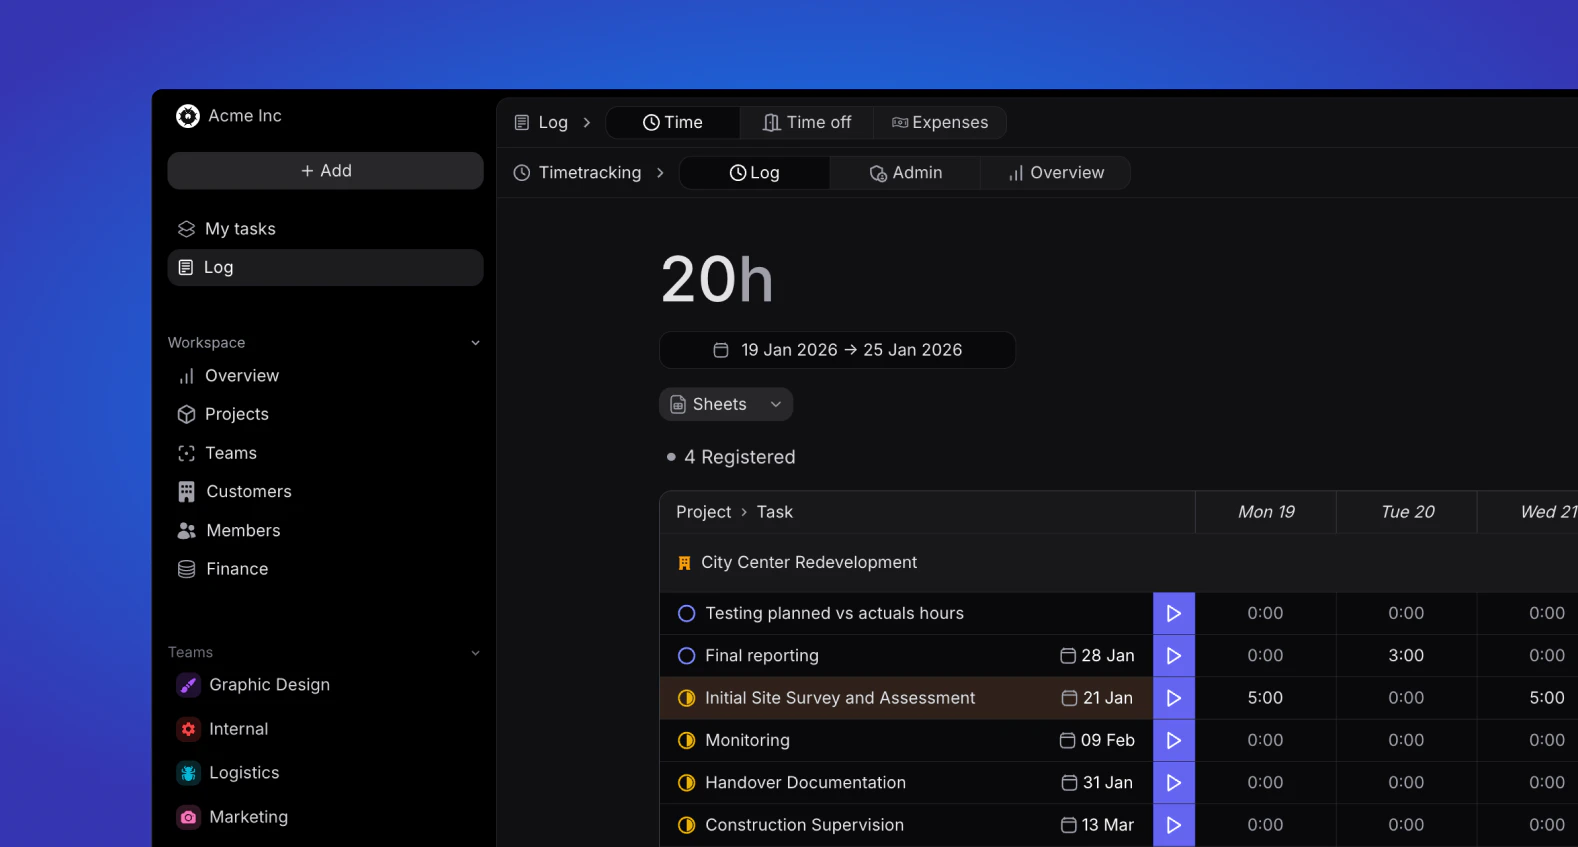
Overview
Most Log tabs use these sub-tabs where they apply:- Log - where you register time, time off, or expenses
- Admin - where admins and managers review and approve entries across the workspace
- Settings - where admins configure that tab (available for Time, Time-Off, and Expenses)
Activity
Activity is your personal calendar under Log → Activity. Use it to see allocations, time entries, and time off in one place, then switch the range to match how you plan your week.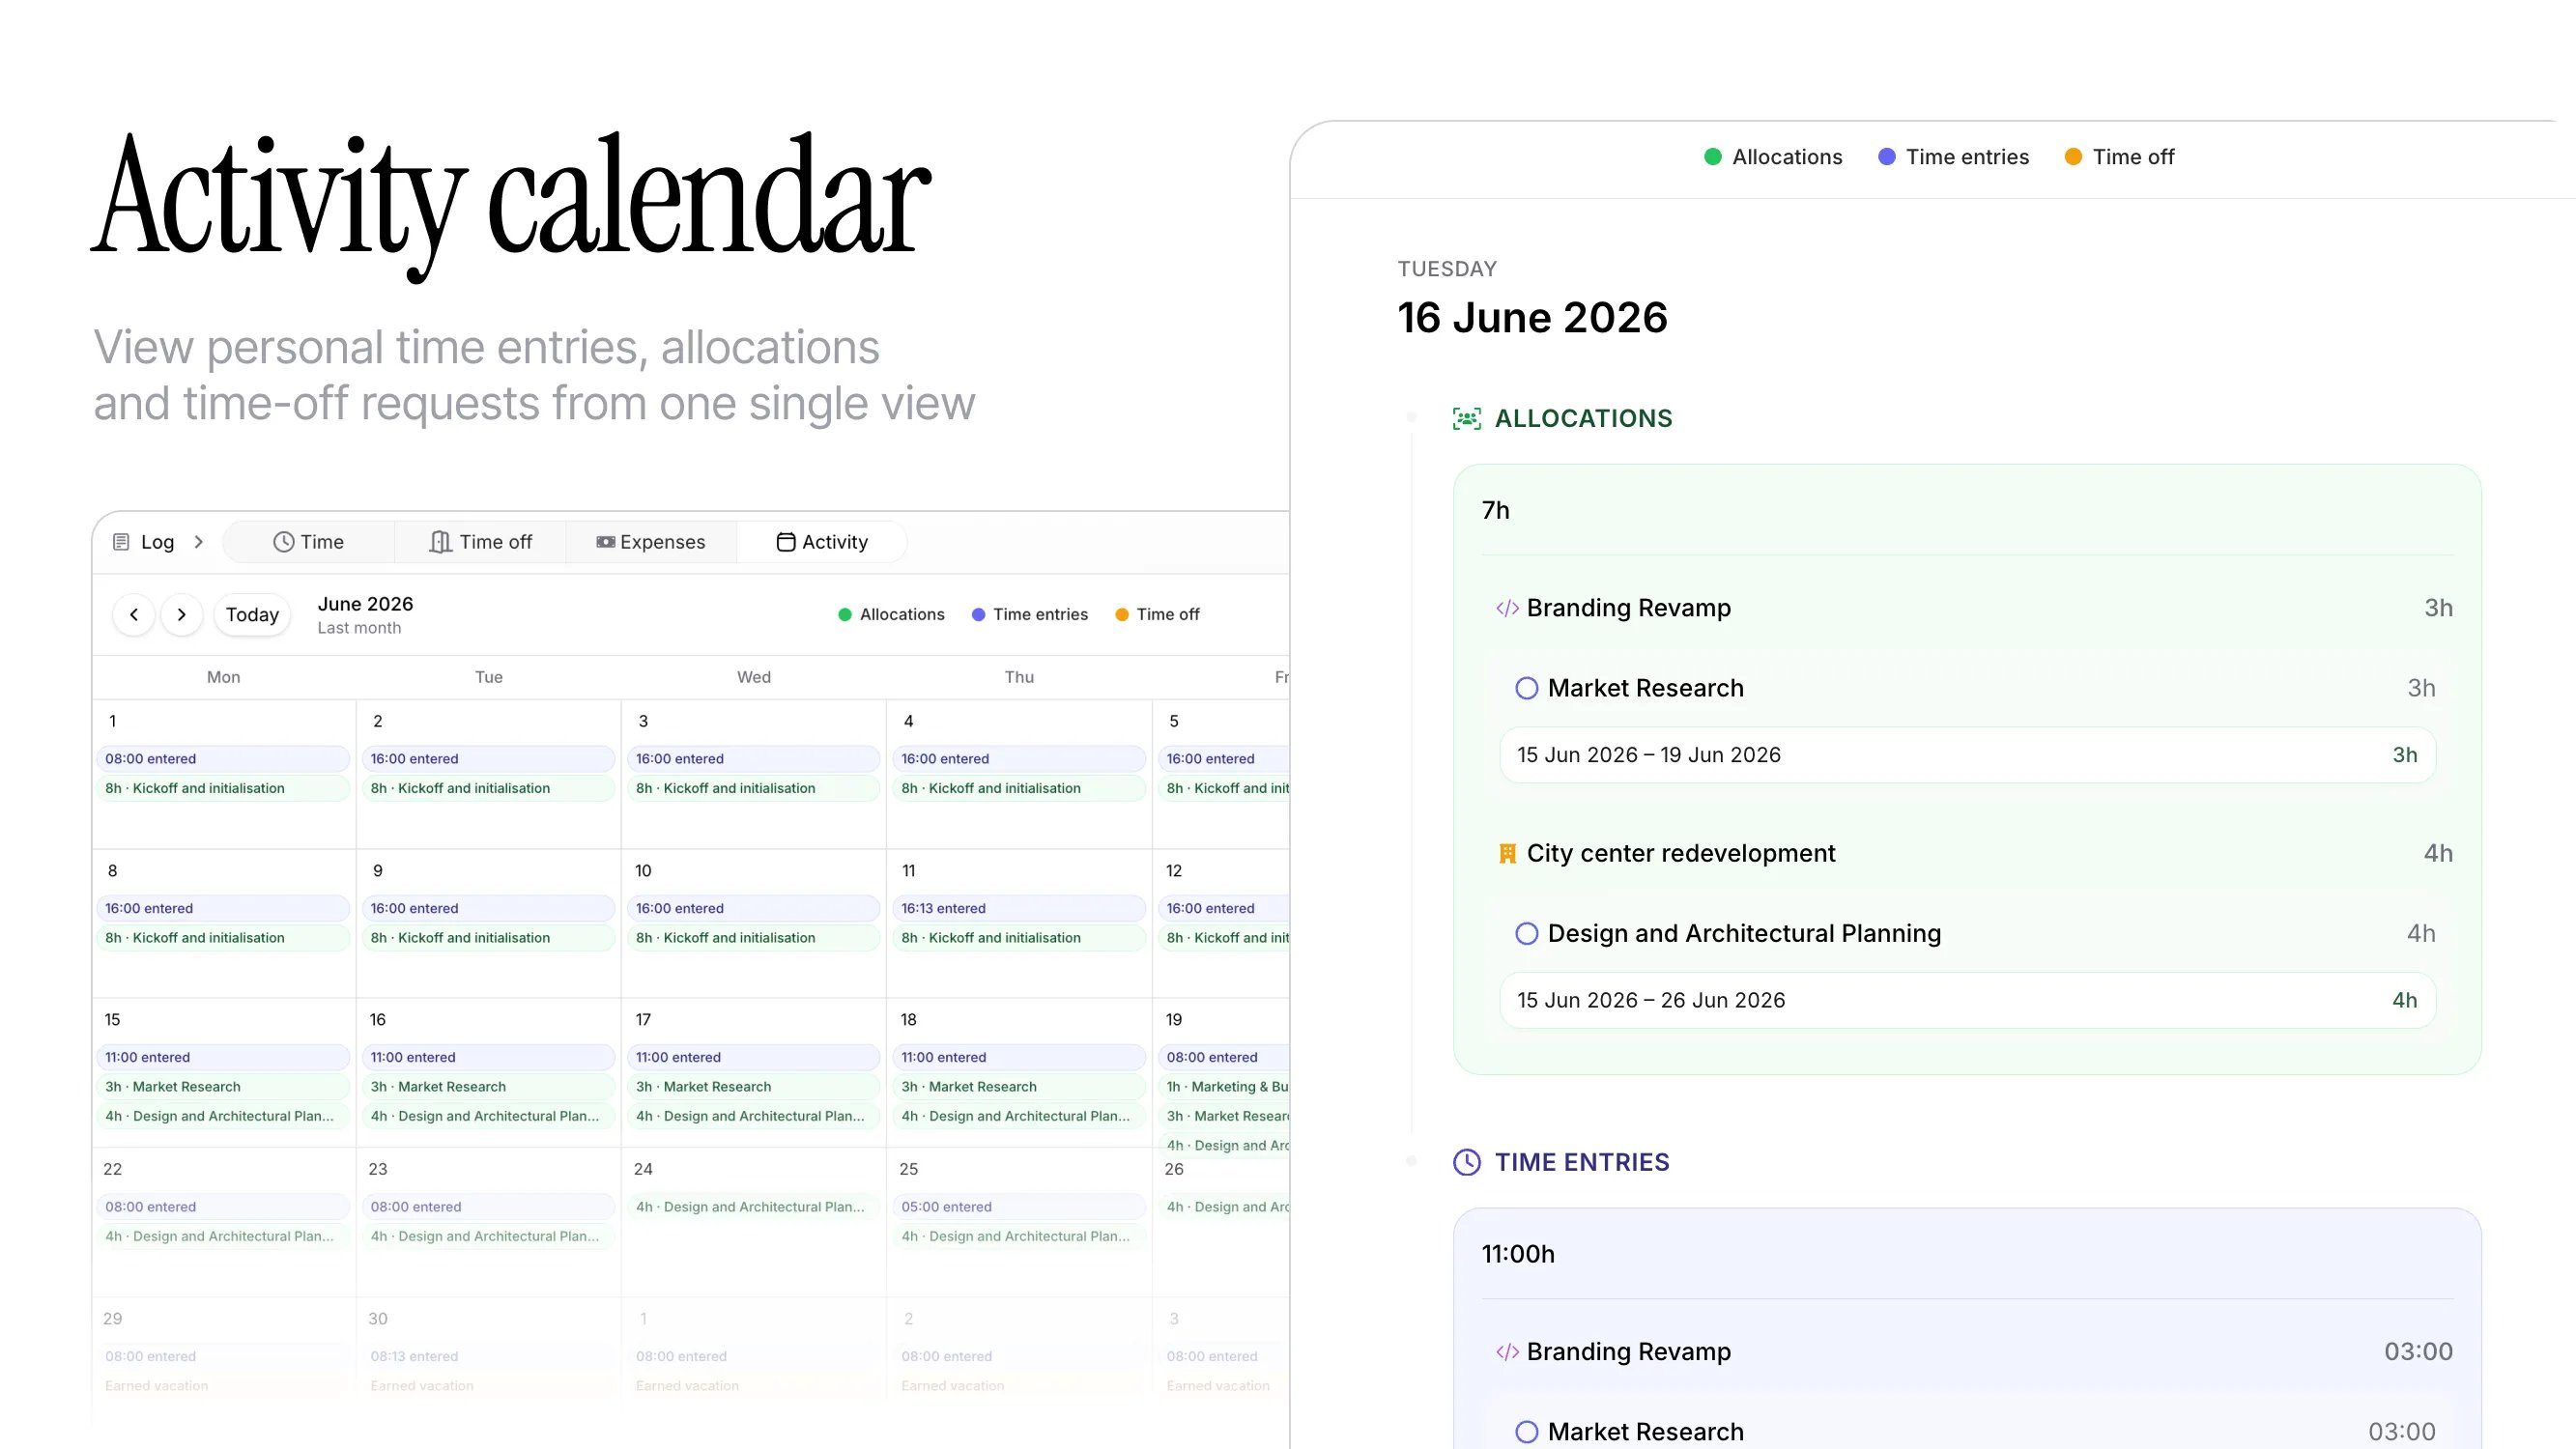
Views
Switch between Day, Week, and Month to zoom in on a single day or scan a longer period. Click a day to open a breakdown of what is scheduled or logged for that date.What you see
The calendar layers:- Time entries - hours you have logged
- Allocations - planned bookings on projects and tasks
- Time off - leave and related time away (including holidays where they apply)
Legend
Use the legend to tell event types apart at a glance. Click an item in the legend to show or hide that type so you can focus on logging, planning, or leave without the others crowding the view.Time Tab
The Time tab allows you to track and manage your working hours across projects and tasks.Log
In the Log section, you can record the time spent on various tasks and projects. Key features include:- Custom Time Periods: Select your preferred time frame for logging hours - daily, weekly, or monthly views are available to suit your workflow, with current week being the default option.
- Hour Summary: View a comprehensive summary of your logged hours, helping you track productivity and project allocation.
- Create New Logs: Easily add new time entries with details such as project, task, duration, and description to maintain accurate records of your work.
- Project(s)
- Proposed / Confirmed - include proposed projects, confirmed projects, or both
- Team(s)
- Task label(s)
- Approval status
Time tracking
Learn more about time entries and how to create them.
Admin
The Admin section displays all time logs that have been submitted for review in the selected time period. Each time entry displays the following information:- Duration and Date: The amount of time registered and the date of entry.
- Task & Project: The name of the task as well as task label(s) associated to the task.
- Approval status: The current stage of the time entry; Registered, Submitted, Approved or Rejected.
- Member & Comments: Who made the time entry and associated comments.
- Approve or reject entries
- Export time entries to CSV
- Summarize using AI
- Delete
Overview
The Overview section provides statistical insights into your logged time:- Visual representations of time spent across different projects
- Productivity trends over days, weeks, or months
- Comparison of estimated versus actual time spent on tasks
- Summary reports that can be exported for reporting purposes
Settings
Workspace admins can configure time entry comment behaviour under Log → Time → Settings, including requiring a comment before save, a default comment for new timesheet entries, and requiring a comment when stopping the timer.Comment settings
Learn how required and default comments work on time entries.
Time-Off Tab
The Time-Off tab helps you manage your leave requests and track available time off. It includes three main sections:Overview
The Overview section allows you to manage your time away from work:- Create Time-Off Requests: Submit new requests by selecting dates, duration, and type of leave
- Calendar View: See your scheduled time off in a calendar format
- Balance Summary: Track your remaining leave allowance across different leave types
Admin
The Admin section helps you track the status of your time-off requests:- Monitor pending, approved, and rejected time-off requests
- View comments or feedback from approvers
- Receive notifications about status changes to your requests
Settings
The Settings section allows you to customize your time-off experience:- Time-Off Types: Create and manage custom leave categories such as vacation, sick leave, personal days, or parental leave
- Holidays: Set up and customize holiday calendars relevant to your location or organization
- Notification Preferences: Adjust how and when you receive alerts about your time-off requests
Expenses
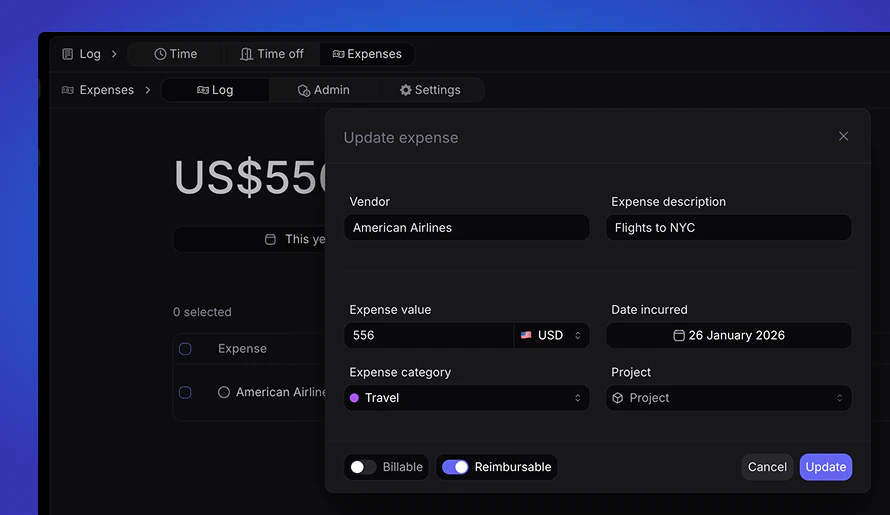
In the expense tab, members can register expenses. Connected accounting integrations can also import expenses and bills into Pike for review.Log
The log part of expenses is where users will register expenses. Doing so will provide the option to fill out the following information:- Vendor
- Expense description
- Expense amount and currency
- Date incurred
- Expense category
- Project association
Admin
As an admin and manager user, view all registered expenses. Each line displays the following:- Vendor name
- Expense description
- Associated project
- Created by
- Total amount
- Date of expense
Import from accounting
If your workspace is connected to an accounting integration (for example QuickBooks), admins can import expenses and bills from that connection into Pike.- Go to Settings → Integrations and open your accounting connection
- Run the expenses import step
- Review rows in the import table - each row shows whether it is an expense or a bill before you bring it into Pike